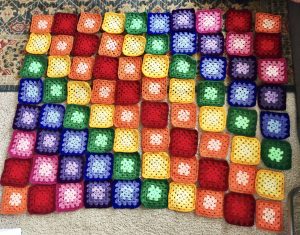
This comfy and colorful blanket was one of the very first large projects I ever made, and I just love how it came out! Don’t those colors just make you happy??
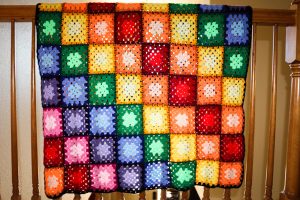
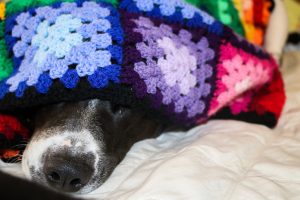
Granny square projects are also some of my favorite projects because they are portable and easy to work with on the go. That means if you bring your yarn along, you can be working on a big project almost anywhere! And this little blanket is perfect for a lap blanket, baby blanket, or dog blanket! (You can see pictures of my dog Luna making herself extra cozy in this one.) You can also increase the number of granny squares to make the blanket bigger.
Have I sold you on how great this blanket is yet? If I did, then you’ve come to the right place! I’m going to tell you how you can make this blanket for yourself. And don’t worry, it’s easy.

Let’s make a blanket!
So this isn’t really a pattern, but more of an explanation of how I organized and put this blanket together. The actual crocheting part of the blanket is mostly just making a lot of granny squares (80 to be exact). Bella Coco has a great video tutorial on how to make a granny square here. For a written pattern from Craftsy, click here. Once you know how to make a granny square, this blanket will be easy peasy!
Yarn:
The hardest part of this blanket is probably getting all the yarn you’ll need! For my blanket, I had 7 main colors with 3 “sub” colors for each. If you look closely at each individual square in my blanket, you can see I have a light shade in the center, a darker shade surrounding it, and an even darker shade for the border. Plus, I got two black skeins to attach the squares and make the border. That comes out to 23 skeins! But luckily, you’ll have some left over for future projects.
The yarn I used was Stylecraft Special DK which you can buy here (affiliate link). There are A LOT of color choices you can choose from. For mine, since I wanted it to be rainbow-colored, I chose three shades of each of the following colors: red, orange, yellow, green, blue, purple, and pink. To make the same color pattern as I did, you can use this graph as a reference:
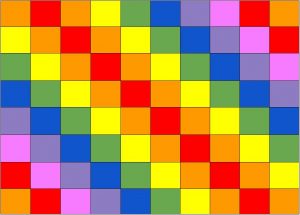
As you can see, I ended up making 18 orange squares, 14 yellow, 12 red, 12 green, 10 blue, 8 purple, and 6 pink.
If you’d like to make your own color creation, I recommend making a graph like I did so that you can visualize what your blanket will look like and so you know how many squares of each color to make. It’s a lot of yarn to keep track of!
Assembly:
After you’ve made all of your granny squares, the next step is to put them together! In order to minimize the chance of making a mistake, I recommend laying out all your squares in the pattern you want them to be in before joining them to make sure everything is in place.
There are many choices you have for joining your granny squares. For mine, I used the single crochet method. It is quick and easy, but it leaves a ridge on one side of the blanket. I think the ridge looks cute, but it is up to you! A video tutorial from AllFreeCrochet on how to use the single crochet join method can be found here. If you want to explore other ways to join your granny squares, CraftPassion has a roundup of 12 different ways here. There isn’t any way that is better than another; it just depends on what look you’re going for!
Bordering:
After you’ve joined all of your granny squares, it is time to finish your blanket with a border! I did my border just as if I was making another layer on a granny square. So I made 3dc in each of the ch spaces and 1ch between each group of 3dc. In the corners, I did 3dc, 2ch, 3dc. Once you get all the way around, finish with a slip stitch, fasten off, weave in ends, and you’re done!
Enjoy your new, beautiful blanket!
 Brrr! This cold weather we’ve been having in Colorado has called for lots of bundling up. And lots of bundling up means lots of hats, scarves, and headbands! That’s why this week I decided to make this super fast and cute headband pattern. The entire project took me less than the time of a movie to complete, but the product is so cozy and cute!
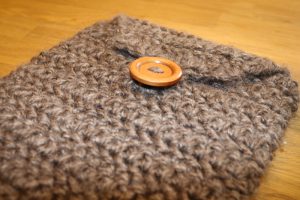
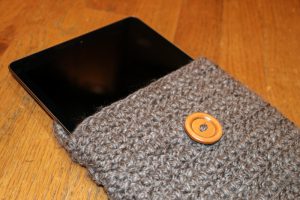
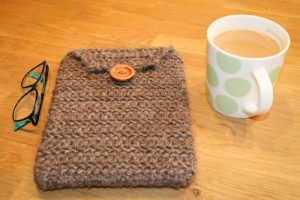
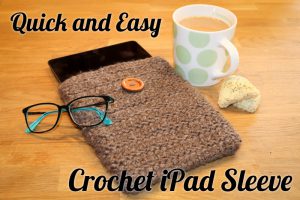 I am very excited to share this iPad sleeve pattern with you! When my brother got an iPad, he wanted something that gave it some protection but wasn’t too cumbersome. Nothing online seemed to fit his needs, or it was too expensive. So, voila! I ended up making this simple, one-skein sleeve, and it has worked great!