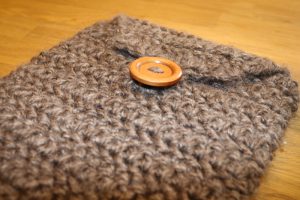
 I am very excited to share this iPad sleeve pattern with you! When my brother got an iPad, he wanted something that gave it some protection but wasn’t too cumbersome. Nothing online seemed to fit his needs, or it was too expensive. So, voila! I ended up making this simple, one-skein sleeve, and it has worked great!
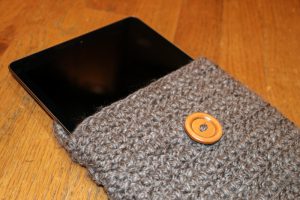
So if you’re looking for a little more protection for one of your devices, or if you want to whip up a quick gift for your tech-savvy friend, this is the perfect pattern for you! This pattern is written for a sleeve to fit an iPad Pro, but it can easily be customized to fit any device you have just by shortening or lengthening the number of stitches you make. (Plus, it’s stretchy!) So without further ado, here is the pattern!
Finished size: Approximately 9.75” by 7” (can be customized to fit a variety of devices)
Materials:
- Yarn: One skein, about 109 yds, of I Love This Chunky, Color: 118 Mocha
- K (6.5mm) crochet hook
- 35mm button
- Tapestry needle for sewing sides and weaving in ends
Gauge: 11 hhdc = 4” and 9 rows = 4”
Abbreviations:
- ch – chain
- hhdc – herringbone half double crochet
- st – stitch
- hhdc2tog – herringbone half double crochet 2 together (decrease)
Notes:
- The pattern has a nice stretch to it so if your gauge is a little smaller it should still work. However, I used almost EXACTLY one skein of this yarn, so if your gauge is much bigger or you are making this for a larger device, you may need to purchase an additional skein.
- The ch 2 at the beginning of each row counts as a hhdc. At the end of each row, your last stitch will be into the top chain of the previous row.
- This pattern uses the Herringbone Half Double Crochet (hhdc) stitch. To do this, yarn over, insert hook into next stitch, yarn over, pull through the stitch and the first loop on your hook, yarn over, pull through all remaining loops.
Pattern:
Ch 40
Row 1: Hhdc in 3rd ch from hook. Hhdc in each stitch across, turn. (38 st)
Row 2-21: Ch 2, hhdc in each stitch across, turn. (38 st)
At this point, you should have a rectangle. Next, we will work on the flap by crocheting across half of the rectangle.
Row 22-23: Ch 2, hhdc in next 18 st, turn. (19 st)
Row 24: Ch 2, hhdc2tog, hhdc in next 15 st, hhdc2tog, turn. (17 st)
Row 25: Ch 2, hhdc2tog, hhdc in next 13 st, hhdc2tog, turn. (15 st)
Row 26: Ch 2, hhdc2tog, hhdc in next 11 st, hhdc2tog, turn. (13 st)
Row 27: Ch 2, hhdc2tog, hhdc in next 9 st, hhdc2tog, turn. (11 st)
Row 28: Ch 2, hhdc2tog, hhdc in next 7 st, hhdc2tog, turn. (9 st)
Fasten off.
Fold the sleeve so that the flap is on one side and whip stitch the bottom and side of the iPad sleeve closed (don’t sew the triangle flap, just sew the bottom and side of the rectangle), turn inside out.
Attach button in desired position on the front of the iPad sleeve, tying a sturdy knot on the inside. My button is attached on row 16.
To make button loop: Make a slip knot and attach yarn to 4th st in row 28. Chain 5 (or however many needed to fit the size of your button), slip stitch into 6th st.
Fasten off and weave in ends.
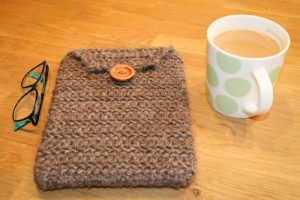
Enjoy your new iPad sleeve!
Love this pattern!! 😍👍
Thanks Adam! I’m glad you enjoyed it! 🙂